Artist Note: Sorry about the low quality of the images here. I thought I had full versions from when I created the original website but either I can’t find them or I edited everything down without saving thinking I wouldn’t have to do this again. The page featured here only exists now in it’s final printed stage but I hope they’re still viewable enough to illustrate what I’m talking about. Thanks.
ONE
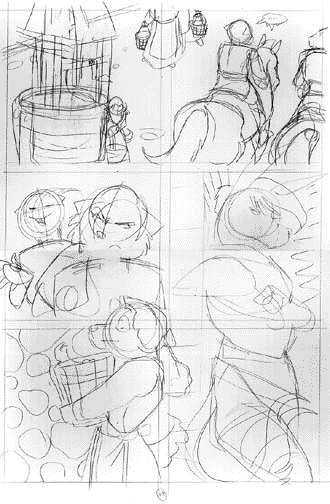
Creating the layout is the most time consuming part of this process. To get it right it can take me several hours of going through books and reference materials before I even put pencil to paper.
After reading over the script and deciding on a scene, I get to work laying out the page. The above is page 14 from TALL TAILS #13.
The average size page I work on is 11 x 17 with half-inch borders on the sides and one-inch borders on the top and bottom. I then divide the blank page into 6 squares with quarter inch borders between them. This is my basic panel guide and I will adjust the boxes as I need them. The panel layout guide shows the maximum number of panels I most likely would have on a page. I don’t like to work with smaller panels because that means drawing smaller – something I really don’t like doing.
Using my mechanical pencil with 2B lead, I roughly sketch out my layout, not worrying about any details or anatomical correctness. This is to get the flow and timing of the page. The only things I concern myself with is making sure word balloons on this page won’t block anything important and to make sure characters have the correct facial expressions for their dialogue and scene.
For that part I use very simple, almost cartoony cues to remind me that Cromwell has an annoyed look and Gorden is being smug (yeah, what a stretch for those two). I’ll still refer to the script as I go on to make sure everything is correct but for now the squiggles will do.
As you can see in the first and last panels, I drew through the adjoining borders.
TWO
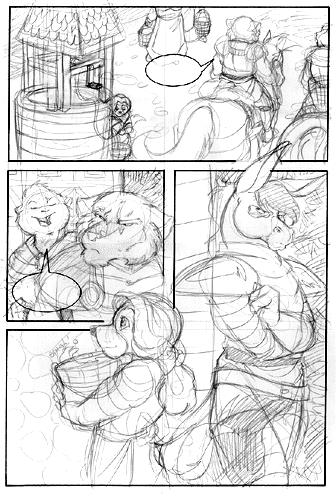
Before tightening the pencils, I take a #4 Rapidograph and ink in the panel borders, avoiding areas that stick or “break out” of the panels. I then take a #2 Rapidograph and an oval template to put in my word balloons remembering to leave a gap for the arrow I put in with a regular ruler.
Now I go back in my pencil and begin to define the characters and details to ready them for inking. Believe it or not, this is as “tight” as my pencils are going to get. Some of you may look at it and think it’s too sketchy to ink. Maybe it is but that’s how I prefer it. Most of my details appear during the inking process. I’ve never done tight pencils like many comic artists but then again, I’ve never had to depend on anyone else to ink my work.
To me, penciling tight and putting in all the details seems like a waste of time. If I’m going to put in everything I might as well ink it. I’m just more comfortable working that way.
THREE
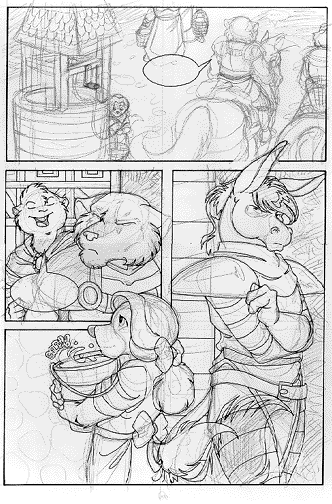
Taking a #2 Rapidograph I begin to ink the largest panels on the page. I find it easiest to ink the panels with the least complicated details first. I start inking the basic outlines of the characters and backgrounds. Right now it doesn’t look like much but then it’s only the first layer.
Mistakes always happen – I accidentally inked in Captain Crower’s leg which is going to be covered by his tail. But since the tail is black, I’m just going to whiteout the lines that show.
FOUR
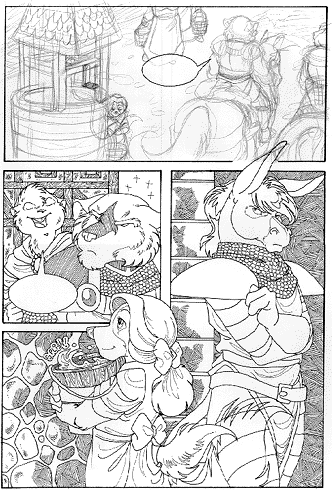
Now the page is beginning to look like something. Continuing with a #00 Rapidograph I add in the finer details including some crosshatching and texturing in the background.”X”‘s in the background mean that the area is going to be a solid black. There are going to be more areas filled in black but I only “X”ed in one part.
After putting in enough detail, I erased the pencils to show you how the inks look so far. I usually don’t erase anything until after the entire page is complete. The only bad thing about doing that is if for some reason I had to use whiteout, the whiteout will pick up whatever pencil schmutz is on the eraser, forcing me go in with whiteout again. You think it would be easier this way, eh? Hey – some things I do just don’t make sense. =O_o=
FIVE
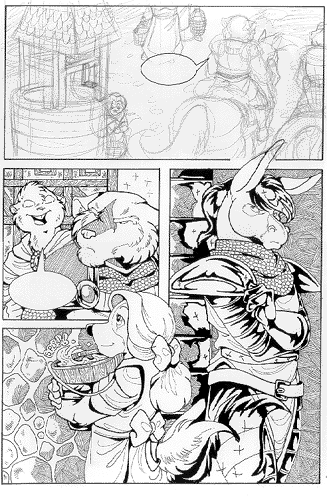
We’re approaching the home stretch here. Now I take my #3 Rapidograph and define individual elements with “shadows”. Just like the first inking step with getting the basic outline down, I am not outlining everything here. I’m just inking enough so that clothing, fur, other characters, etc. begin to stand apart from each other
Notice the areas with the “X”‘s. As you can see, I did not fill in those areas totally with my pen. Instead I just blacked out the very edges so that when I go in with my marker, I don’t accidentally go over the more delicate lines and corners.
SIX
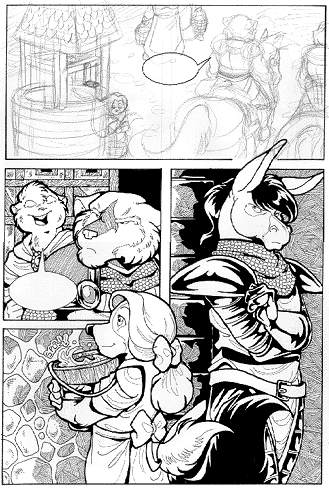
Well, that’s it with those bottom panels. I take my #4 Rapidograph and only ink the very outline of the characters plus add in more shadows. With a *gasp* Sharpie marker I fill in the large black areas.
I know some of you are asking if using a Sharpie is bad for the page. Well, yes and no. If the page is displayed openly then there is a risk the Sharpie areas will bleed and turn the paper yellow over time. But since all my pages go into storage where it will have no access to any light, that doesn’t [usually] happen.
Note Captain Crower’s tail. After filling it in, I went in with a whiteout pen and only painted out the lines that were showing where I didn’t want them to.
SEVEN
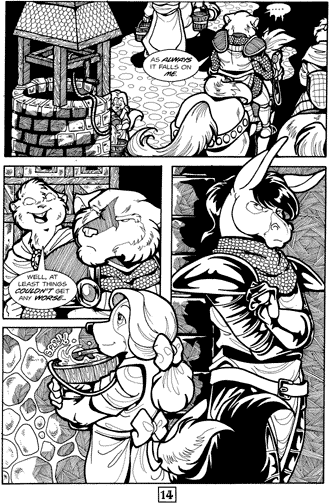
Here it is, the finished product. After I inked the top panel I cut out the words and pasted them into their respective balloons along with pasting the page number.
Edit: Of course, now a days, the word balloons, lettering and the page numbers are all done on the computer which is a huge relief for me. You know how hard it is to cut out elliptical shapes evenly? And yes – I used to hand cut out the balloons until I realized I can draw them directly onto the page! Thank goodness I don’t have to do that any more. The sketching, penciling and inking still remain all hand done though.
Artwork just isn’t proper unless I get my hands dirty!
